Majestic 40 at Gardener's Ridge

building a Wisdom Majestic in North Kellyville


Leave a comment

One year on

Well it has been a while since I last posted but here is an update on what has been happening.

In February this year we had our last outstanding PCI and maintenance issue completed. We’ve now been in our home for fifteen months and love it. We’ve been busy bees in this time and completed the landscaping, planned the pool and installed solar power.

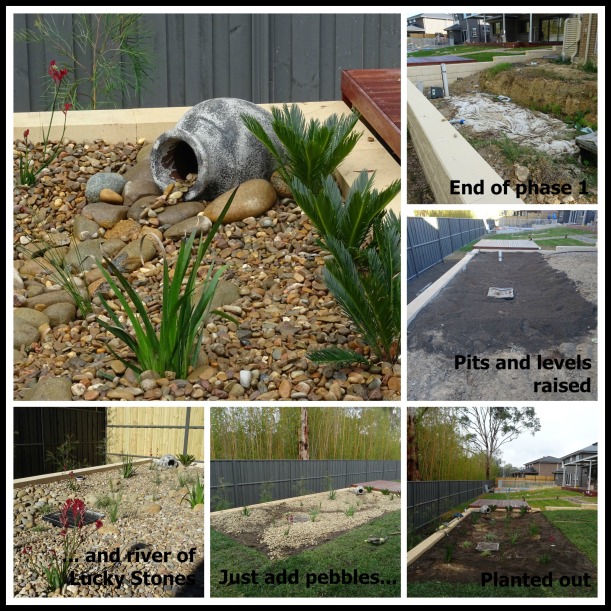
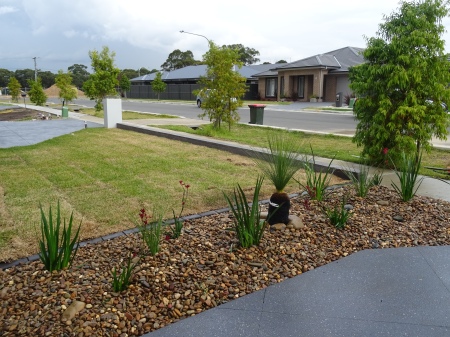
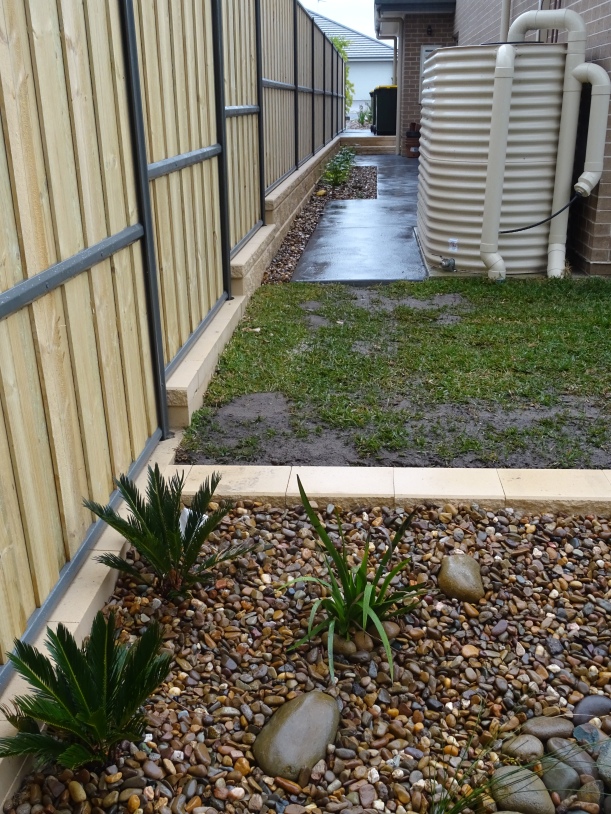
Landscaping and Rain Garden
Everything has taken well except for the small Kangeroo Paws. I was so worried about over watering them that I went the wrong way and under watered instead.


The grevillea seem happy and the birds are already visiting to feed on it. Next door’s bamboo seems even happier as it has spread to our side of the fence.

Grevillea:

Grevillea

16-02-17-download-056

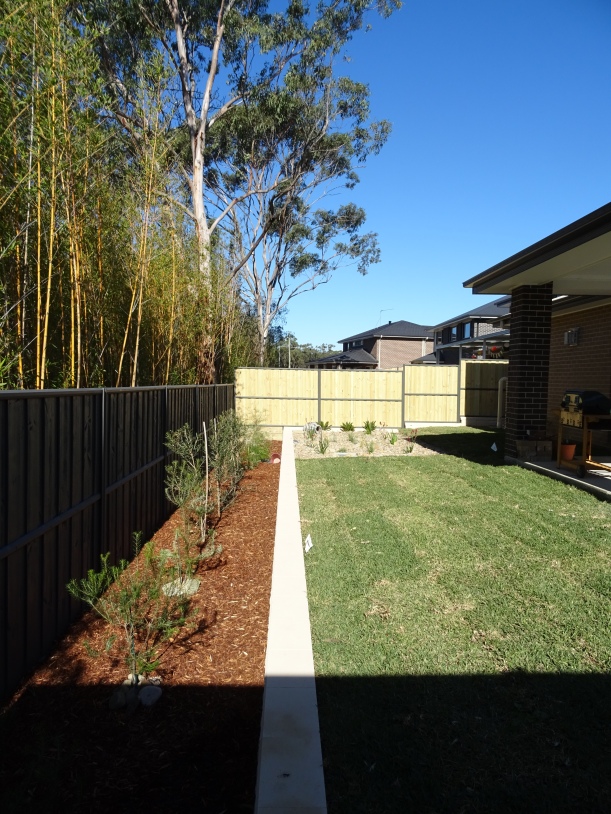
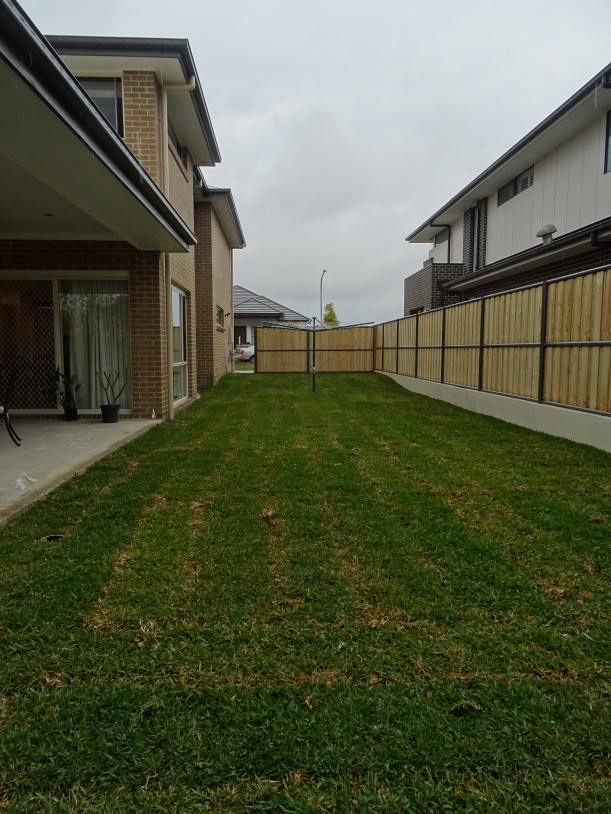
Check out the grass. As I’m at home all day I offered to take over grass cutting duties if we bought a petrol mower I could start. Faster than a speeding bullet my husband turned up with this Victa petrol mower with battery start ignition:

16-02-17-download-057

He says it is the best money he’s ever spent! Funnily enough he didn’t criticize my wonkey donkey lines or the fact I managed to scalp one of the pipes on my first attempt. I’m pleased to report that I am getting better with practice. I also now use a Ryobi edger with a lethal looking  blade to get a sharp clean edge, each time I use it I wonder if this will be the time I sever the irrigation pipes.
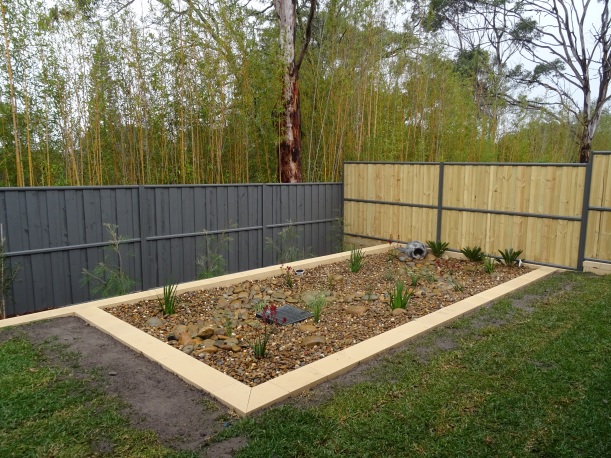
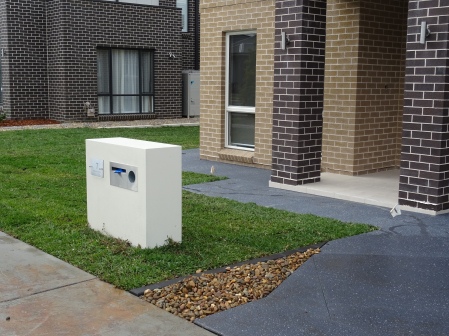
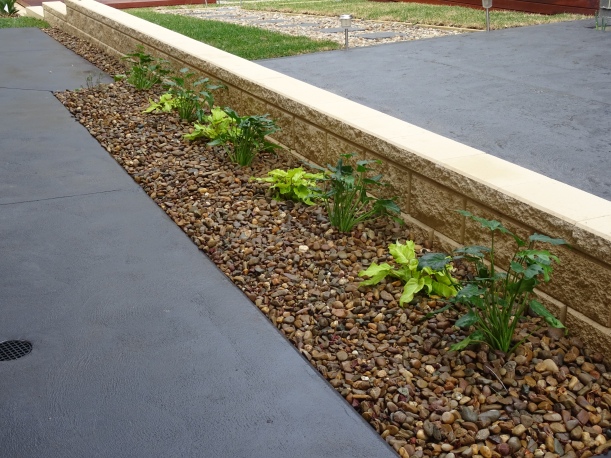
Rain Garden
The rain garden gets the most interest out of any of my blog posts. As far as I can tell it seems to be functioning well and I managed to catch a photo of it in action during the last torrential downpour of which we’ve had a few recently:

16-02-17-download-021

Pool
Next up is getting the pool. We chose a house design which is long and narrow in order to have the space to put a lap pool down the side at some future point. We’ve just signed a contract with Jade Pools for a 10.5m x 3.2m concrete lap pool and a 2 x 2m spa.
It has been harder than I thought to plan the pool and also to conform to BASIX (Building Sustainability Index) requirements.
NSW BASIX info
NSW BASIX pools and spas
Once we had a plan we pegged it out in situ to see if it worked.

16-02-17-download-002

We even hauled chairs out to sit in the ‘spa’ and see if it felt the right size. I’m sure the neighbours thought we were mad if they saw us doing it.
Then back to the drawing board to tweak it yet again.
The pool company then hit us with all our BASIX requirements as we were > 40000 litres. So now we need to squeeze in another rain tank of approximately 3000 litres and a pool cover. Pool cover no problem but finding space for the tank was a challenge due to the size of our block.

In between all our planning the large property behind us has sold and so we are now considering putting some sort of privacy screening up, probably a pergola of some sort.

I took the opportunity to look at metal artwork for the pool area when I was on a trip to Melbourne recently.

I visited Entanglements:
http://www.entanglements.com.au/

entanglements

and Lump:
http://lump.com.au/

lump

[photo courtesy of Lump]

So my plan is to blog about our pool build over the next few months. I’ll also blog about our solar panels which miraculously survived the massive hail storm but that’s a story for another time…


2 Comments

Landscaping … The End is Nigh

The end of May saw our landscapers return after a slight hiatus whilst they created a show home garden at Oran Park. The irrigation people also turned up and installed a Hunter X-Core computerised system so it was all systems go.

GR May 2016 036

Meanwhile we bought a Dulux paint sprayer ready to use on the timber side fences when they are done. First up we practiced on the existing back fence where raw timber was exposed after it had settled. Next was the rendered letterbox and retaining wall which still needs a final coat of Dulux Weathershield in Hogs Bristle once all the landscaping is finished.

rendering collage

Rain Garden  

It is hard to believe that the huge pit is now a shallow depression thanks to the retaining wall and more layers of sand, gravel plus a top dressing of loam. I’ve put a lot of effort into making sure we abided by the guidelines but yet managed to have something both functional and interesting. Time will tell how successful I was.

Checklist:

  • Required dimensions from our Instrument 88B:
    • Area = 13.29m2
    • Volume = 1.89 m3
  • Batters: Height= 150mm, Width= 450mm
  • Separate new Outlet Pit as rain garden is now higher than the Inter-Allotment drainage pit
  • Surge pit 150mm lower than the new Outlet Pit
  • Total Depth minimum 800mm comprising of three layers:
    • Bottom layer of gravel minimum 150mm
    • Transition (middle) layer of fine sand minimum 100mm
    • Top layer of loamy sand mix minimum 400mm
  • Planting with at least 50% Carex, Sedge or Melaleuca
  • Mulch of river stone, basalt or sandstone

The layers of the rain garden make it resemble a layered cake:

three layered cake

[image from: zig-zags-over-the-rainbow-cake from www.joann.com]

With the extra layers to raise the height our rain garden now appears more like:

Betty Crocker six layer cake

[image from Betty Crocker:Betty Crocker Rainbow cake]

The garden has been scraped down 100mm, stones, bricks and builders rubbish removed and decent soil spread ready for the lawn of Sir Walter Buffalo turf. The Irrigation system is in with drip feed to the flower beds and pop up sprinkler heads for the lawns. The control box is installed in the garage and weather sensor will be installed once the fence is.

Enough talking here’s some progress photos:

The rain garden taking shape:

Rain Garden planting Collage

I enjoyed choosing the native plants at Plantmark and enjoyed it even more when the landscapers planted them for me 🙂

Rain Garden Planting:

Raingarden Planting Collage

[Plus Anigozanthos Bush Revolution, Ficinia nodosa and Xanthorrhoea glauca]

The 1.5m rear easement has been planted up with a mix of banksia, grevillea and callistemon (bottlebrush) which will eventually form a privacy hedge in case our neighbour’s bamboo hedge disappears. Hopefully these plants will also encourage the birds to visit from nearby Cattai Creek too.

Rear Easement Planting:

Rear Easement Planting Collage

Shaded side path planting of Philodendron:

Side Planting Collage

[standard and Philodendron ‘Gold Bullion’]

Front:

GR Landscaping 09-07-16 030

[Xanthorrhoea johnsonii & Kangaroo Paw]

I’m pleased with how the rain garden and ‘river’ of lucky stones turned out:


GR Landscaping 08-07-16 001

[Plenty of opportunities for shots of it in the rain at the moment…]

The last plant was in and I was off back to the UK an hour later, talk about cutting it fine. Fast forward a month and the fencers visited in my absence.

X marks the spot … or not.

Despite both a flag and the landscaper highlighting the irrigation pipe the fencers managed to put a post smack bang through the pipes. That turf is now well and truly watered in…

Fence looks good though and so far has stood up to some high winds.

Now I’m back and the landscapers have returned to edge the rain garden and roll the lawn. The gates are being made as I write and will be installed next week and then that is phase 2 of the landscaping complete.

Front, back and sides:

Not the first cut of the lawn but the finished photos  🙂

Front:

GR Landscaping 05-07-16 006

GR Landscaping 05-07-16 004

Back:

GR Landscaping 05-07-16 016

and sides:

GR Landscaping 05-07-16 007

[Austral Heron block retaining wall in ‘Limestone’]

GR Landscaping 08-07-16 005

GR Landscaping 08-07-16 007

[Now I have my Hills Hoist in the rain seems never ending…]

Phase 3 will be transforming this 6 metres wide lawn at the side into a lap pool and spa. No time frame on that yet, its not going to be in by the Summer of 2016 but hopefully by the following Summer.

Meanwhile back at the ranch …

Seven months on and PCI, Handover and Maintenance issues are still dragging on but whilst I was away the fire place was fixed and then Hubby painted it. He was tempted to follow our neighbour’s recommendation and paint it burgundy but used the Dulux ‘Gaiety Tan’ we’d previously agreed on.

GR Landscaping 09-07-16 005


Leave a comment

13 Week Maintenance Period


It’s hard to believe that we have been in our new home for thirteen weeks already. Our maintenance shakedown period has come to an end and we had to supply Wisdom last week with a list of any issues that had arisen.

I’m pleased to say that the list isn’t very long and there isn’t anything major on it. The only clanger seems to be all our ceiling fans are wired incorrectly. The three speeds are set as:

  1. Super fast
  2. Slow
  3. Fast

So now I am armed with two lists of corrections: The original list of outstanding Practical Completion Inspection (PCI) jobs that weren’t completed before handover and now the maintenance issues.

In an ideal world the PCI list would have been completed in the two weeks after PCI and before handover but with the Christmas shutdown looming that didn’t happen. A few of the jobs were done after we moved in and before Christmas then it went quiet in January and picked up a bit before February. It didn’t help that we were back in the UK for the whole of February for my Niece’s wedding 🙂 . A bit of a shock going from a beautiful Aussie Summer to the British Winter but there were bright days.

UK February 2016 017

Stourhead, Wiltshire


All the tradies were supposed to be booked in for our return but so far most are conspicuous by their absence. Perhaps they will be like buses and all come at once.

So what have we been up to in the house?

The driveway and the man cave.

The driveway:

In my last post I wrote about the driveway that was spray coated that day and how happy I was with the end result. In the photos you could see how beautiful and sunny it was. Fast forward a few hours and the rain came pelting down. Unfortunately the sealant hadn’t fully dried in the saw cuts and the rain got under it and blistered it 😦

They had to come back three times to make it good but thankfully in the end it has all been sorted.

The man cave:

Actually it has been hubby that has been hard at work sorting the garage out over the last two weekends. So after a few trips to Masters and Bunnings behold his hard work:

UK February 2016 268

There is a bit more to do but my car does now fit in the garage. Shall we place bets as to when I reverse into the wheelbarrow or clip the bikes? I did notice that it is the boy’s bikes behind my car and his bike is safely to one side 🙂

What’s next?

The landscaping starts this week!!!

I am so looking forward to it starting and watching it take shape. I am keen to complete the rain garden once the retaining walls are in. The rain garden is looking rather sad at the moment but not for much longer.

UK February 2016 270

For planting inspiration I treated myself to a beautiful book called Birdscaping Australian Gardens

Trouble is I need a bigger garden for all the plants I like the look of 🙂


6 Comments

Driveway & Rain Garden


Last week in the blistering heat they laid the driveway. The polar opposite from when the slab was laid when it poured with rain.

Tuesday late afternoon they did the formwork:


GR 24-11-15 008

GR 24-11-15 006

then on the Thursday in 39 degrees they poured the plain concrete.

GR 26-11-15 002

GR 26-11-15 003

Friday they saw cut it:

GR 01-12-15 PCI 005

GR 01-12-15 PCI 003

Then after at least 3 weeks curing time they spray on a fancy flecked coloured topcoat. As we are fast approaching the Christmas shutdown it will be the end of January before it is finished in all its glory.

We have chosen to have Wisdom Landscaping do our driveway and front path but will get our own landscaper to finish off the paths around the rest of the house. There will be an apron of paths and pool surround around most of the house to protect against slab heave. This follows recommendations by CSIRO in their sheet ‘Foundation Maintenance and Footing Performance: A Homeowner’s Guide’ which Wisdom handed out to us at some point in the proceedings.


GR 26-11-15 005

However did you spot that we are now fence free? After nearly seven months the house front is finally revealed  🙂

The missing balustrade is up now that the tile they cracked when originally fitting it has been replaced.

They had done a site tidy and scrape but the soil from the driveway excavation is now stockpiled to the left. The sand and gravel that has also appeared is the left over from the rain garden being rectified this week.

North Kellyville Rain Garden

For better or for worse we are required to have a rain garden. Unfortunately what was put in during the early stages of the build was not what was on the signed off Construction Plans. Wisdom agreed to correct it later in the build and it was finally done in the nick of time before PCI.

Original rain garden incorrectly sized and sited but seeing it in situ also highlighted the slope towards the bottom of the plot.:

NZ May 2015 299

We’d hoped not to have to have a retaining wall at the bottom of the garden. However if we don’t raise the level of the garden then the drop into the rain garden would be too dangerous. I had visions of children or the unwary disappearing over the edge!

So the retaining wall stays, the garden is raised and we have made the rain garden longer and narrower to try and stop it spreading towards the house so much. Once the walls are in we can use risers to put the rain garden Surge Pit and Outlet Pit at the required levels. The Surge Pit must be 150mm below the surface of the Outlet Pit and level with the finished surface of the rain garden. Then we just fill it up with the final layers, plant it and be done with it. Sorted! 🙂

I now know more about the ins and outs of rain gardens than I did at the beginning or ever wanted to. No doubt once our storm water system is up and running we’ll head towards a drought instead!

Here are a few pics of it being redone on a very hot day:

rain garden 1 Collage

Rain Garden 2 Collage

It looks huge at the moment but when the retaining walls are in, the batters up and the levels sorted it should end up not so in your face … I hope!

The QA team made a flying visit to the house this week apparently but did not manage to complete before our PCI on December 1st. More about that in my next post 🙂


4 Comments

Light at the End of the Tunnel


Now that the end of our build is drawing near I am starting to think a bit more about the decor and finishing touches.

We’ve decided not to buy any new furniture until we move in and get a feel for the place. Doesn’t stop me drawing up wish lists though 🙂

Soft furnishings are another matter! The window coverings are all done and dusted: chosen, measured, made and just waiting to be fitted. Lighting sorted too.

We chose to have Clipsal, through Wisdom, do most of it with a mix of LED downlights and oyster lights. The two exceptions to be done are the stair light and dining area light. Stair light sorted, pretty simple, a cluster of three pendant lights. We just need a sparkie with a tall ladder.

GR 19-07-15 061


The dining light has taken longer. We went to Living Edge in Alexandria to look at a Herman Miller Aeron Office chair. We looked at both it and the Mirra 2, I think the Mirra 2 made it on to hubby’s wish list.

GR 25-09-15 077

GR 25-09-15 067


GR 25-09-15 069


I felt a little like a fish out of water there as it is all original designer and very $$. However I came across a light that I fell in love with. Well I think really it should be called a work of art, it is a feature glass installation not a light. It is from Lasvit in Czech Bohemian glass by the designer Nendo. Behold the beauty that is ‘Growing Vases’:

GR 25-09-15 066

GR 25-09-15 080

It is huge at 1000 x 1400mm and I loved it. I read about it being the blowing of glass vases and growth etc but to me I look and see …. Christmas decorations!!! Sorry Nendo. Now for a few weeks I kept hankering after it and eventually summoned up the courage to ask Living Edge how much it cost. Really the clues were already there , Czech glass, designer glossy catalogue, no prices … Well we won’t be having it as at $27K it’s a little too rich for me.

I was on a roll that day so when we passed Coco Republic I made hubby slam on the brakes and went for a nosey. Still a fish out of water  🙂

I saw some ‘interesting’ ideas;

GR 25-09-15 100

I could easily replicate these book pillars as I have a lot of books but I won’t!

GR 25-09-15 097

I can’t look at this without grinning and yelling “Yeehaw! Ride ‘em Cowboy!!”, in my head.

So back in the real world, today we went and bought a rather more budget friendly light for the dining area where the feature is wood shavings rather than hand blown glass.

Washing Machines & LIghts 009

Now no soft furnishings are complete without cushions! I am amazed at the Aussie makeover shows penchant for dressing rooms with copious amounts of cushions. So not to be left out I decided to dig out my craft box, fire up my mother’s trusty old Bernina sewing machine and produced these Aran cushions:

Aran cushions 001            Aran cushions 002

The Aran’s were works in progress of my Nanna B from back in the 70’s.

Meanwhile, back at the Ranch…

Next week two big items, the rain garden and the QA team visit.

Wish me luck, I’m meeting with the plumber on Monday to rectify the rain garden. All I want is what was on the signed off Construction plans so hopefully that will all go OK. Second time lucky! I shall keep you posted.

The QA team come in after the cleaners, inspect and finish up all the little jobs after everyone else. They were supposed to come last week but were held up.

Here are a few sneak peaks whilst cleaning was in progress:

GR 18-11-15 025

Dining area looking out to where we would like a lap pool:

GR 18-11-15 027

Dining area looking out to the Alfresco:

GR 18-11-15 028

Windows cleaned and site scraped:

GR 18-11-15 032

Scaffolding can come down when they erect the rest of the balustrade. Unfortunately they broke a balcony tile whilst tying to install it but that’s been replaced so they can finish up now. Site fencing to come down next week, portaloo has disappeared since this photo.


2 Comments

Re-charge batteries

Last week saw us take a break from the build and enjoy a short trip to North Island, New Zealand where we enjoyed the peace and tranquillity of the Bay of Islands.

Bay of Islands, NZ Collage


It was good timing from a build perspective as the slab had just been laid and needed to cure. We were also waiting for the infamous quote for the meter box to be re-sited.

Our neighbour-to-be, Scott, was kind enough to keep an eye on our build and let us know if anything was happening. So after arriving back in the dark on Friday we hot footed it to the site on Saturday morning to check it out.

We arrived just as the frame was finished being delivered, the blue colour on the timber is a termite treatment.

frames 16-05-15

[excuse the wonkey donkey photo – guess who lost the level indicator on her camera….]

The site was looking good as the storm water drainage had been done and the site had been tidied.  Here’s hoping, as we weren’t here to see it happen, that they didn’t cut into the Service Free Zone. This is earmarked for a pool further down the line, hopefully, after we have recovered from the expense of the build.

Enter stage right: The rain garden!

Rain garden 16-05-15

As far as I can tell at this stage it looks OK. I’m not sure it is sited quite correctly as it appears to extend to the boundary line but I shall raise that with our SS when he calls today.

Good news for our neighbours in 309 and 310, also Wisdom builds, who had their sites scraped on Friday and their piering and formwork done on Monday. Today they’ve had their plumbing done and their waffle pods and reo delivered too – its all go!

…. STOP THE PRESS …. STOP THE PRESS …. STOP THE PRESS …. STOP THE PRESS ….

We have frames!

Just popped up to the site and hoped that they might have started the framing and they’ve nearly finished the ground floor! What a difference a day makes 🙂


GR 19-05-15 GF Frames 001

View from the RHS across 310’s formwork and piering

GR 19-05-15 GF Frames 004

View from the LHS – including the meter box.


4 Comments

Plans and CDC

Progress!

Last Tuesday we received our updated CDC plans from Wisdom. Unfortunately there were a few errors in them but today we received the corrected plans. I have updated the House Plans section in my header bar with these and the elevations as well but for now here they are in all their glory:

CDC GF

CDC FF

Now if you’ve been following they mightn’t look any different to the old ones so here’s where the big difference lies:

stepdown

Downstairs to the left the ceilings will be 2590mm and everything to the right will be 2930mm.

Let us not forget the rain garden which we should really rename the money pit ….

CDC Stormwater

So now that we have the plans we can apply for water board approval.

Wisdom applied for us whilst the plans were being updated, unfortunately the Sydney Water Quick Check system returned a ‘No records found’. This is normally because it is on a new development and Sydney Water haven’t updated their mapping system yet.

The outcome is we need to pay for an assessment by an Accredited Water Service Coordinator (WSC) and a sewer peg out or Works as Executed plan (WAE) will need to be obtained. Hopefully this will show that our build will not affect any of Sydney Water’s assets and approval will be issued.

We are arranging this ourselves as it would have cost $910 for Wisdom to do the Works as executed plan plus if needed:

  • $300 to survey boundary pegs
  • $365 for an amended engineers plan to show zone of influence

Well, touch wood, our boundary pegs are still in place and the sewer is also pegged out. We will be using the company who our developer contracted the sewer work to so hopefully it will happen quickly.

CDC

Once we have that we are able to apply for our CDC approval.

CDC being our Complying Development Certificate not what Google throws out:

  1. The American Center for Disease Control & Prevention or
  2. The Australian Centre for Disease Control.


In case you have forgotten what building CDC is all about I mentioned it previously here:

/2014/10/13/land-settled/


1 Comment

Milestone – Tender Acceptance

Yay! Our revised tender has finally arrived and it looks good to go. So time to pay our $3000 to move to the next square on the board – drawing up our plans. I can’t wait to receive them and see our home take shape. So what did we ask to be included over the basic house design? In no particular order:

  • Extra site costs (BAL 12.5 measures, saline soil, extra piering for future pool, H class slab)
  • External variations (Nova facade with a twist, full brick house – no cladding or cement board, extended alfresco)
  • Windows, doors & glazing (lots of changes here – for example the standard window in the powder room is huge and in the actual shower with clear glazing. In the interests of not frightening the neighbours or the local wildlife we have changed this!). Double glazing to the front of the house, LIN1 internal doors…
  • Internal finishes (master bed head feature wall with shelves – remember the earlier post re: robes & aliens…, extra Master robe – well away from the bed for the same reason, stair upgrade, soundproofing – our family are not the lightest on their feet, electrical….)
  • Kitchen & Butler’s Pantry (allowances for extras and modifying the Butler’s Pantry, upgrade to 40mm Caesarstone benchtops)
  • Wet areas ( incorporating the WC into the main bath, free standing bath in the en-suite- ooh, I’m excited about this one already, shower to powder room minus the exhibitionist window, additional tiling)
  • Landscaping plan & rain garden

Some of these we have no choice but to do such as the extra site costs and some – well OK a few more than some – would be the icing on the cake. We’ve included them for now and they will be revisited when we have our actual colour appointments. That is where we are told what is actually included as basic and how much it would be to change it, so we will see how it all pans out. In case you are wondering what BAL is back in the UK, it is a rating for Bushfire Attack Levels (0, 12.5, 19, 29, 40, FLZ). The higher the level the more measures you need in place, such as window & door screens to protect against embers etc. The rain garden is also a necessity from the Council. This is to help offset impact on the environment along with our 3000L rain tank and recycled water usage. I am interested to see what other people will be doing with theirs. Since we have to have it I plan on making it a positive feature in the garden. Still not too sure if it will end up being a snake magnet with all those hot rocks for them to sun themselves on though.  Hopefully the large gums at the bottom of the garden will attract the kookaburras who will keep them in order. Here’s one who was inspecting the fences at Gardener’s Ridge the other day. Image